arrow arrow

Energy efficinecy

  • Narrow roofs and ceiling constructions
    • About 42% of the warmth losses of the average non-insulated structures (homes) are manifested through the marrow roofs and the ceiling constructions, at the older structures this loss can be even up to 60%. Or if we are talking numbers:
      • If you are spending 2000l of oil for heating about 840l ‘leak out’ through the roof and the ceiling constructions
      • Money-wise that is 2000l * 40den = 80.000den (on a yearly basis)
      • The loss is 840l * 40den = 33.600den (on a yearly basis)
  • Walls
    • On the walls the loss of the heating energy is about 24% at the non-insulated structures. Of course here we have to take it into account, the size of the windows that also a great spoil of the heating energy. The bigger the windows, and the balcony openings are, the more energy will be lost during the winter period; respectively it will be warmer in the summer period. As an example for saving energy we can consider the older Macedonian houses that have small and deeper window openings.
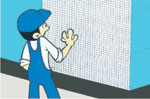
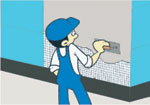
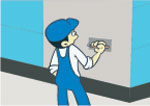
    • The very insulating of the walls can be done through several ways, depending on the building that needs to be insulated:
      • At the new structures it is common to directly apply the TERMOPOR-EPS® by using the procedure of applying the TERMOPOR® thermal facade.
      • At the older structures the existing facade is ‘peeled off’ and then the TERMOPOR® thermal facade is applied
      • At structures where it is almost impossible to insulate on the outside (cause of neighbours objections or the height of the structure, the thermal insulation is done on the inside (inner thermal facade).
close me

Insulating from the inside of the walls

One of the most common methods of thermal insulation

close me

Sandwich wall insulation

One of the most common methods of thermal insulation

close me

Outside thermal facade

close me

How to apply TERMOPOR-F?

  • image

    1.The surface (brick, concrete etc.) at which the TERMOPOR-F is applied, have to be cleaned off any dust or bumps.

  • image

    2.At the bottom of the wall the cornering outline is applied whose dimensions depend on the thickness of the TERMOPOR-F panels, for example, if you use panels with 50mm thickness than the cornering outline has to be with 53mm thickness.

  • image

    3.The cornering outline on the wall is strengthened with standard screws and wall-rivets. Eventually as a replacement of the cornering outlines can be used a wood lath whose thickness is compatible with the thickness of the TERMOPOR-F panels, that are used for the thermal insulation.

  • image

    4.Along the strengthened cornering lath on the wall the rabitz net is glued, whose bottom end after the application of the first panel is flipped over it. For the net application, special glue for polystyrene is used.

  • image

    5.TERMOPOR-F 20kg/m³ panels are glued on the wall in that way the glue is equally spread on every corner of the panel and on several other places on the panel.

  • image

    6.Every new row begins at the middle of the previous panel.

  • image

    7.After the application of all the TERMOPOR-F panels is complete, the next step is the application of cornering PVC outlines on all the openings of the facade (doors, windows etc.)

  • image

    8.On the glued TERMOPOR-F panels a layer of glue is applied and in it the rabitz net is pressed (5*5mm). The net is applied in that way that there is overlapping.

  • image

    9.By adding just a little more glue you move on to the final refining of the surface, and after 24 hours, with a roller, all over the surface, a layer of the founding matter is applied.

  • image

    10.Few hours after the application of the founding matter is applied has been done, you can start with the application of the top layer of the facade, for which we use a smoothing tool.

close me

Thermal insulation of the floor

  • image

    1.surface must be clean and smooth

  • image

    2.the surface need to be cover with prajmer - a cold liquid (when there is a need for hydro insulation)

  • image

    3.hydro insulation is placed (when there is a need for hydro insulation)

  • image

    4.diletaciona bar is placed

  • image

    5.Termopor® panels are placed with 30kg/m³ density (for perfect condition 2 layers are needed)

  • image

    6.PE foil is placed for cover

  • image

    7.concrete layer is being placed (it is advisable to use thin wire network)