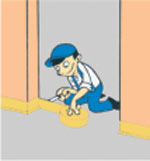
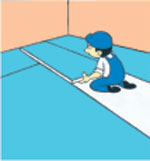
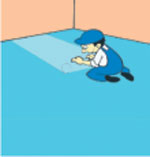
arrow arrow

TDS XPS FL 400-L

Description:

FIBRAN XPS FL 400-L is a thermal insulation board made of extruded polystyrene, having a smooth surface and edges in the shape of letter “L” to prevent the formation of thermal bridges.

Applications:

Thermal insulation gives unconditional protection in humid environment or under extremely heavy mechanical load.

  • Thermal protection of parking surfaces on inverted flat roads
  • Thermal protection of classic flat roofs
  • Thermal protection in heavily loaded systems of green roofs
  • Thermal insulation and hydro=membrane protection of cellar walls
  • Thermal protection of shop, warehouse and industrial floorings
  • Thermal protection of high building base plates

Quality

Products are tested in accordance with:

  • EN 13164
  • EN 13501-1
  • EN ISO 11925-2: 2002

At the following notified laboratory:

  • ZAG Ljubljana
  • FIW München
  • MPA BAU Hannover

Environmental protection

  • Products FIBRAN xps are produced with environmentally friendly blowing agents
  • 100% recyclable

Technical characteristics

XPS – EN 13164 – T1 – CS(10/Y)400 – DS(TH) – WL(T)0,7 – WD(V)3

Properties Measure units EN standard 400-L
Shape of profile L
Surface Smooth
Board dimension mm EN 822 1250/600
Thickness tolerance EN 823 T1
Declared value of compressive strength at 10% deformation kPa EN 826 400
Declared thermal conductivity (after 25 years) 20mm≤d≤30mm W/(m*K) EN 12667 0.033
40mm≤d≤50mm 0,036
≥60mm 0,038
Long-term water absorption by immersion Smooth surface vol % EN 12087 0.7
Water absorption by diffusion vol % EN 12088 3
Water vapor diffusion resistance factor (-) EN 12086 150-50
Temperature of use ° C Од -50 до +75
Reaction to fire Класа EN 13501-1 E

Declaration code under EN 13164

  • XPS – abbreviation for extruded polystyrene
  • EN 13164 – number of European standard for extruded polystyrene thermal insulation material
  • Ti – declared level of thickness tolerance
  • CS(10/Y) – declared compressive strength at 10% deformation
  • DS(TH) – declared rate of dimensional stability under specified temperature and humidity conditions
  • TRi – Tensile strength perpendicular to faces σm
  • WL(T)i – declared rate of long-term water absorption by immersion
  • WD(V)i – declared rate of long-term water absorption by diffusion
  • MUi – declared water vapour diffusion resistance factor
close me

Insulating from the inside of the walls

One of the most common methods of thermal insulation

close me

Sandwich wall insulation

One of the most common methods of thermal insulation

close me

Outside thermal facade

close me

How to apply TERMOPOR-F?

  • image

    1.The surface (brick, concrete etc.) at which the TERMOPOR-F is applied, have to be cleaned off any dust or bumps.

  • image

    2.At the bottom of the wall the cornering outline is applied whose dimensions depend on the thickness of the TERMOPOR-F panels, for example, if you use panels with 50mm thickness than the cornering outline has to be with 53mm thickness.

  • image

    3.The cornering outline on the wall is strengthened with standard screws and wall-rivets. Eventually as a replacement of the cornering outlines can be used a wood lath whose thickness is compatible with the thickness of the TERMOPOR-F panels, that are used for the thermal insulation.

  • image

    4.Along the strengthened cornering lath on the wall the rabitz net is glued, whose bottom end after the application of the first panel is flipped over it. For the net application, special glue for polystyrene is used.

  • image

    5.TERMOPOR-F 20kg/m³ panels are glued on the wall in that way the glue is equally spread on every corner of the panel and on several other places on the panel.

  • image

    6.Every new row begins at the middle of the previous panel.

  • image

    7.After the application of all the TERMOPOR-F panels is complete, the next step is the application of cornering PVC outlines on all the openings of the facade (doors, windows etc.)

  • image

    8.On the glued TERMOPOR-F panels a layer of glue is applied and in it the rabitz net is pressed (5*5mm). The net is applied in that way that there is overlapping.

  • image

    9.By adding just a little more glue you move on to the final refining of the surface, and after 24 hours, with a roller, all over the surface, a layer of the founding matter is applied.

  • image

    10.Few hours after the application of the founding matter is applied has been done, you can start with the application of the top layer of the facade, for which we use a smoothing tool.

close me

Thermal insulation of the floor

  • image

    1.surface must be clean and smooth

  • image

    2.the surface need to be cover with prajmer - a cold liquid (when there is a need for hydro insulation)

  • image

    3.hydro insulation is placed (when there is a need for hydro insulation)

  • image

    4.diletaciona bar is placed

  • image

    5.Termopor® panels are placed with 30kg/m³ density (for perfect condition 2 layers are needed)

  • image

    6.PE foil is placed for cover

  • image

    7.concrete layer is being placed (it is advisable to use thin wire network)